
The Variable Disposal Site Report option allows a method to create your own Disposal Reports and save them as templates to be used on a regular basis. You can also create one time reports as needed. Like all Variable reports, the Disposal Site Variable report can be generated as a printed document, a spreadsheet file that can be uploaded into excel, or an iSeries file that can be used in query or other report writing tools.
From the Operations menu, select option # 24 Variable Disposal Site Report and the Disposal Rec Rpt Template screen will be displayed.
If you are a System Administrator, you can see templates created by ALL users. If you do not have System Admin authority, then you can only see templates that you created.
To Add a Template, click on ![]() and a screen will be displayed for you to enter a template name and description.
and a screen will be displayed for you to enter a template name and description.

Key in a template name and description. When finished, click on ![]() or press F11 to Confirm and continue. The Variable Disposal Rec Selections screen will appear.
or press F11 to Confirm and continue. The Variable Disposal Rec Selections screen will appear.
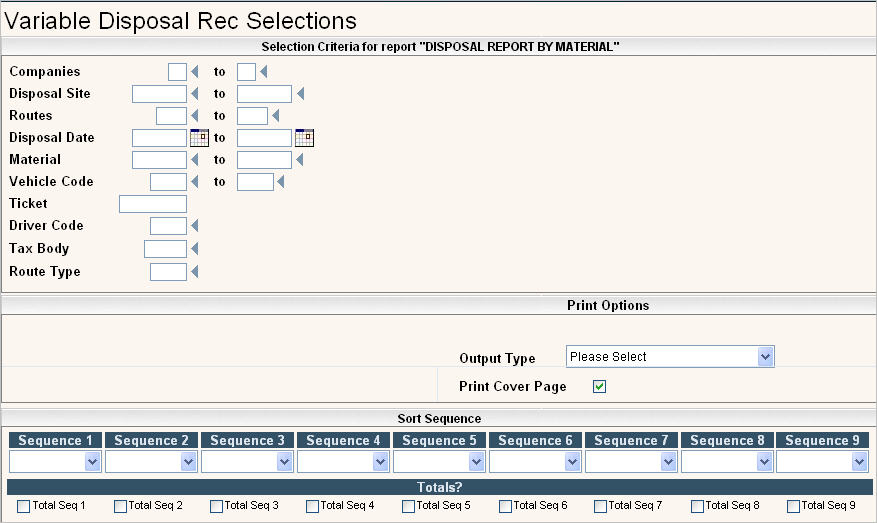
Selection Criteria
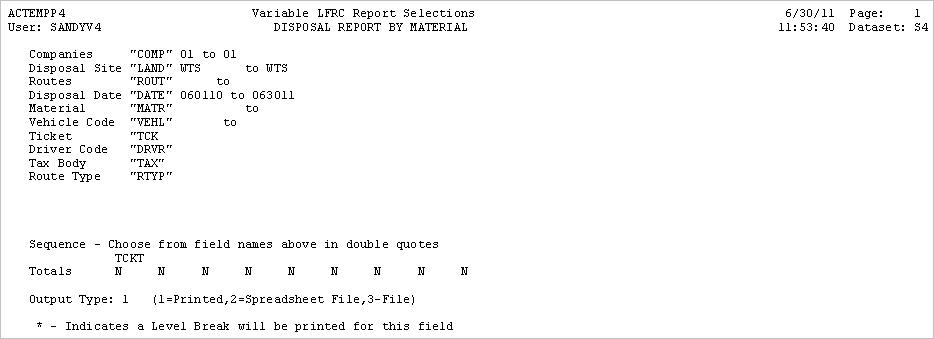
The top portion is where you tell the report which records you want to include. Leaving a field blank means that you want to include "All" of those records. If you were trying to reconcile a bill you received from Wit's Transfer Station for the month of June, 2011, you would enter the following information on the screen.
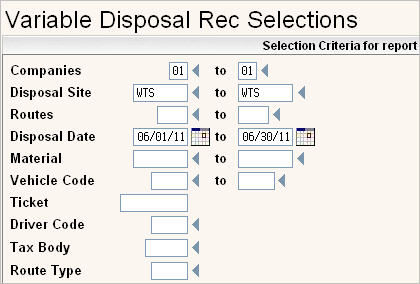
This will show all transactions that were recorded with disposal site WTS for company 01 for the month of June, 2011.
Print Options
The middle section is where you select how you want your report to generate. Your Output Type choices are:
Printed - This will generate a printed report in your spool file named ACTEMPP4. You can use Report Form Setup to set this report to hold before printing, save after printing, or go to a certain output queue.
Spreadsheet File - This will generate a spreadsheet file that can be downloaded into excel. See below for more details.
File - This will generate an iSeries file that can be used in query or other report writing tools.
Print Cover Page - Click ![]() Yes to print a cover page that lists the selection criteria you chose for the report.
Yes to print a cover page that lists the selection criteria you chose for the report.
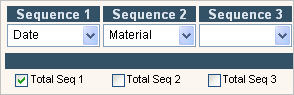
Sort Sequence
The bottom section of the screen allows you to determine how the report will be sorted and what fields you want totals on. If your disposal facility generates a bill by DATE and MATERIAL, then it would be good to sort your report the same way. You can also choose to have totals (for any numeric fields) by Date as well.
However, if your disposal facility generates a bill by ticket#, then it would be easier to sort by ticket # instead, but it does NOT make sense to Total by ticket # as then you'd have a total after each record.

When you are finished updating all of your fields, click or press ![]() and then
and then ![]() to save. This will NOT run the report, it only saves the template.
to save. This will NOT run the report, it only saves the template.
To RUN the template report, either double click the template name, or highlight the name and click ![]() . You will get a message window saying the report has been submitted to batch, press
. You will get a message window saying the report has been submitted to batch, press ![]() to continue.
to continue.

The report will generate in the form selected under Print Options.
To run a One Time Report, click ![]() and follow the steps above. When you click or press
and follow the steps above. When you click or press ![]() and then
and then ![]() the report will immediately generate in the form selected under Print Options.
the report will immediately generate in the form selected under Print Options.
More on Print Options:
Once you have taken the option to generate a variable report, you can go to any menu and click on ![]() . No matter which option you chose, there will be an entry under Messages when your variable report is complete.
. No matter which option you chose, there will be an entry under Messages when your variable report is complete.
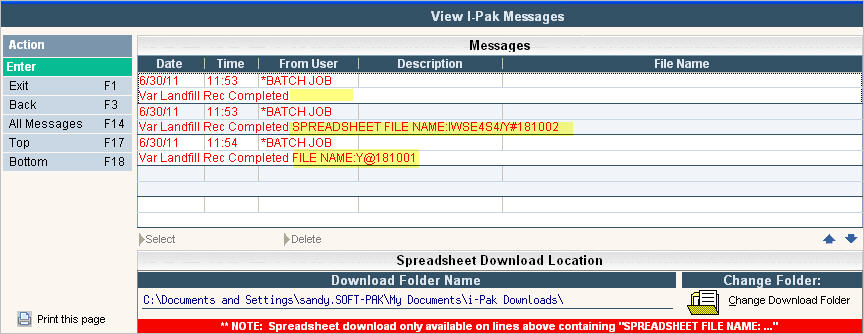
The first entry is for a Variable Report that was set to Printed. It should either have automatically printed or be held in your spool file, based on the settings in report form printer setup.
Cover Page
Sample Report

The second entry is for a Variable Report that was set to Spreadsheet File. If you Double click on the entry with a SPREADSHEET FILE NAME, the data should transfer into an excel spreadsheet.

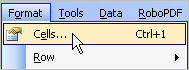
![]() Date fields need to be formatted in excel. Highlight the column by left clicking on the column header, then click on Format, then cells at the top of your excel screen.
Date fields need to be formatted in excel. Highlight the column by left clicking on the column header, then click on Format, then cells at the top of your excel screen.
A window will pop up for you to select how you want to format. Select DATE and the way you want the date to appear.

Press enter and your dates will convert to a date format.

The third entry under View i-Pak Messages if for an iSeries File. The entry will be saved to the dataset library you are currently using (ex = IWSE4S4) and the file name is listed on the messages screen (Y@181001).